10 Effective Tips to Extend the Life of Your Carpet

Carpets get old like every other thing in our house. We should maintain them by cleaning them regularly. You can hire professional cleaners to get the best cleaning services and maintain the carpet. Professional cleaning can help in making the carpet look new. Regular cleaning and vacuuming at our home are also necessary to make the high-traffic carpet look new. Moreover, pets can not only spoil the carpets but can also spoil your mood. Pet stains can be difficult to remove and they can be very stubborn and stinky. Pet stains can be usually found on the edges of the carpets. There are many ways to clean pet stains. Pet stains can cause many problems such as diseases related to respiration and skin. These diseases can become dangerous sometimes and can lead to many other problems. In this blog, you can learn tricks about how to clean and maintain a carpet to make it look new. You will get to know more about the tips to remove pet stains from carpets. 

Here Are 10 Effective Tips to Extend the Life of Your Carpet:

  1. Regular Vacuuming

Vacuuming is easy and can be done using any vacuum cleaner at home. Using a vacuum cleaner also has many benefits such as it does not leave any residues. There are many ways to vacuum a place. There are particular places that need to be considered before vacuuming. The most important places are under the sofa, under the couch and many such hidden places. Vacuuming will help in the removal of dirt particles and many other things from the carpets. Always take an expert’s advice before buying a vacuum cleaner. Make sure the machine is good and not too expensive. 

  1. Use Homemade Remedies 

Homemade remedies are the best for cleaning any type of carpet. There are many types of home remedies.

  • The mixture of baking soda and vinegar- Baking soda and vinegar are the two best products for removing any kind of stains and spots from the carpets. All you need to do is sprinkle a little baking soda on the stain and later add vinegar solution to make it a paste. Then gently rub it using a hard brush. Leave the solution for 4-6 hours and later when it gets dried up vacuum the baking soda residue. 
  • Baking powder and corn flour- This is a dry cleaning option. This is used if you are not looking to make the carpet wet. Mix a bit of corn flour with a small amount of baking powder. This mixture is best for the removal of greasy stains from the carpets. In this method sprinkle the powder on the stains and it will absorb all the greasy stains and later vacuum it. You can repeat this process until the stains are completely removed. 
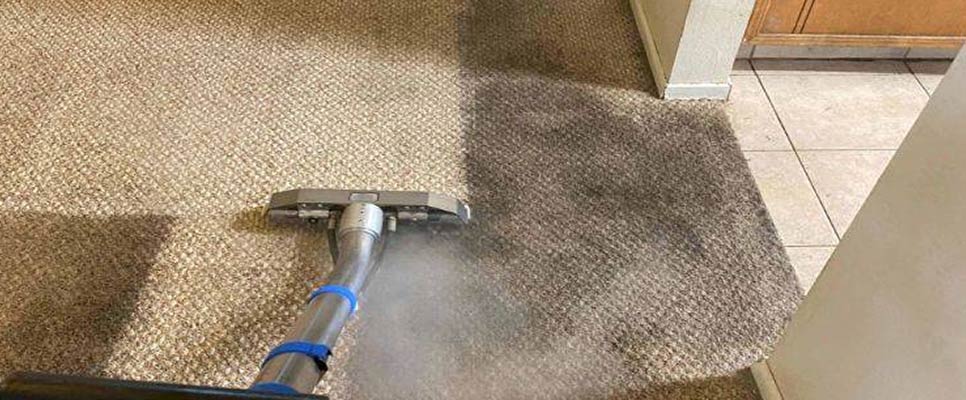
  1. Steam Cleaning Regularly

Steam cleaning is one of the best processes to get rid of stains and give your carpet a new look. This process is completely chemical-free and safe for humans and the environment. The steam cleaning process can be done by ourselves or can be done by hiring professionals. The heat from the steam will disinfect carpet fibres and remove all the allergens from the carpet. This technique is very helpful in making the carpet look like a new one. 

  1. Deep Clean Your Carpets Regularly 

Deep cleaning of your carpet is very important as it will help to give your carpet a completely new look. In this process, all the stains are removed with the help of carpet cleaners. There are many types of carpet cleaners available in the market for deep cleaning. This process also helps in removing the dirt embedded in the carpet. It is important to deep clean your carpets twice a year for better results and to increase their lifespan. 

  1. Spot Cleaning The Stains 

Spot cleaning is one of the best ways to maintain carpets and increase their lifespan. Whenever the stains are fresh we have to clean the carpets on the spot in order to get rid of the stains. We can use a wet cloth for easy stains or a cleaning agent for tough stains. You can take expert advice for the proper removal of stains and dirt from the carpets. This process is very important in order to give the carpet a new look.  

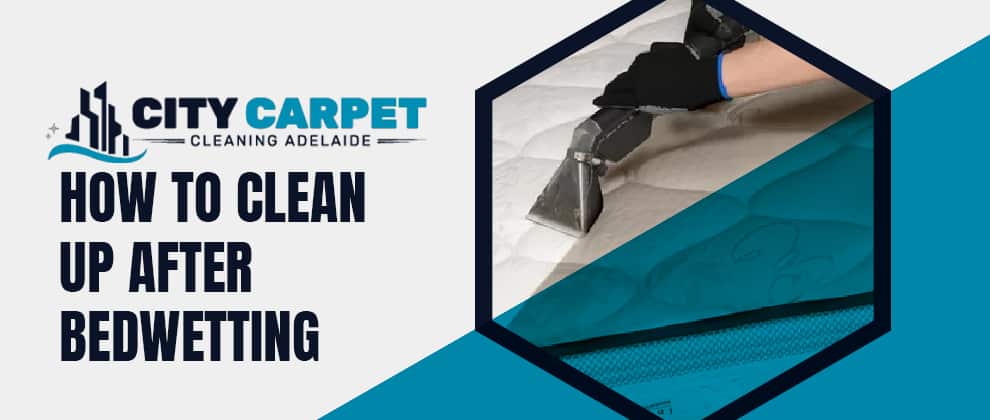
  1. Take Instant Action For Pet Stains

Whenever you find any pet stains on your carpets you must take an instant option to get rid of that stain. Many pet stains can be removed if they are taken care of on time. Some pet stains can be hard to remove and can become permanent if not removed on time. We can use a wet cloth or a sponge to blot the stains and get a stain-free carpet. You can also use a mop to get rid of the pet stains from the carpets. 

  1. Use Vinegar And Dish Soap solution

Vinegar is known to be the best homemade remedy to get rid of all the stains from carpets as well as furniture items such as sofas, couches and other upholstery. To make this solution you need to first boil 2 cups of water and later add 1 tablespoon of liquid dish soap and add ½ cup of vinegar. Later dip a cloth or a sponge in the mixture and apply it to the stained area and later blot it tightly. Repeat this process two more times to remove all the tough pet stains from the carpet. This is one of the best tips to remove pet stains from carpets. 
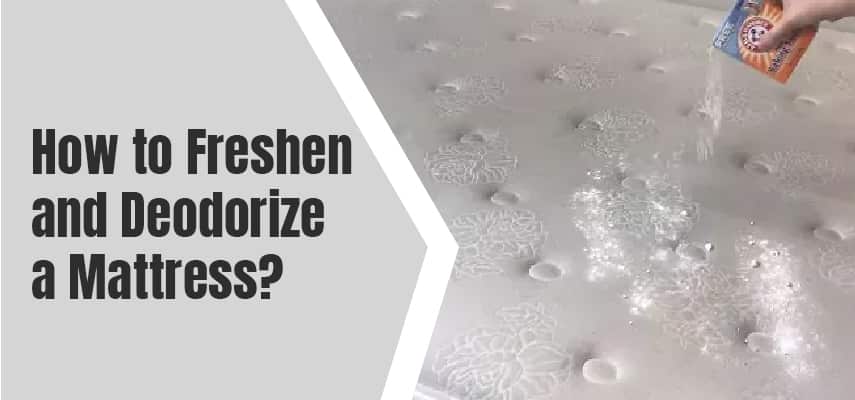
  1. Removing The Odour

After cleaning the stains, removing the odour is also very important. Sometimes odour can become a headache if not taken care of on time. There are many ways to get rid of the odour caused by stains. You can use natural solutions such as vinegar and also use fragrance providers that are available in the market. But make sure you don’t use any fragrance provider that can cause side effects to your skin and might also cause diseases related to your respiratory system. 

  1. Let The Urine Stain Dry To Remove It Easily

Urine stains can be removed easily once they are dried up. We must make sure we should let the urine settle and dry before removing them from the carpets. Once it is dried up we can rinse the area thoroughly with plain water. And later use a vacuum cleaner to get rid of the stains from the carpets. 

  1. Hire Professional Cleaners 

Professional cleaners will not only offer cleaning services but will also give you the best tips to remove pet stains from the carpets by yourself. Many companies provide professional carpet cleaning services. Make sure you choose the best company and top professionals for the best possible carpet cleaning services to extend the life of your carpet. You can hire the best cleaning team at City Carpet Cleaning Adelaide

Conclusion

You can follow these 10 effective tips to extend the life of your carpet. However, we are always there for you a call away to help in this work. 

How Much Does it Cost to Clean Tile and Grout? A Comprehensive Guide

Need to clean your floors and tiles but have no idea “How Much Does it Cost to Clean Tile and Grout?”, you can check here to know this aspect briefly. Cleaning tile and grout is a vital investment for both residential and commercial spaces. The cost varies depending on factors such as tile type, surface area, and the level of dirt and stains. Generally, do-it-yourself tile and grout cleaning prices might range from $0.50 to $1 per square foot, but they might not achieve professional results.

Opting for professional tile and grout cleaning services, which typically range from $9 to $12 per square foot, ensures a thorough and effective clean. These services utilize specialized equipment and techniques, leaving tiles and grout looking pristine while prolonging their lifespan. 

The choice between DIY and professional cleaning depends on your budget, the desired results, and the long-term maintenance of your valuable surfaces.

Per Square MetreMinimum PriceSpecial Offer*
$9 – $11$340$399

Factors Influencing Cleaning Costs in Adelaide

If you want to briefly understand “How Much Does it Cost to Clean Tile and Grout?”, you must have a brief understanding of these factors before you analyse and finalise prices. 

  • Tile Types Unique to Adelaide: Adelaide’s architectural diversity extends to its tile types. The prevalence of sandstone and bluestone tiles gives the city a distinct character, but these materials demand specialized care. Tile and grout cleaning costs may vary based on the specific requirements of these unique tiles, ensuring their longevity and original splendour.
  • Embracing the Urban Landscape: Adelaide’s urban landscape offers a mix of residential and commercial spaces, each subjected to different levels of foot traffic, pollutants, and weather variations. As people traverse the city, they unknowingly contribute to the accumulation of dirt on tiles and grout lines. The varying degrees of wear and tear can affect the cleaning costs associated with different regions of the city.
  • Climate Impact on Grout: Adelaide’s Mediterranean climate, characterized by warm summers and mild winters, can pose challenges for tile and grout maintenance. The humidity during certain seasons can lead to mold and mildew growth, particularly in grout lines. Understanding the climatic impact on tile maintenance helps homeowners and business owners take proactive measures, impacting the frequency and cost of cleaning.
  • Local Cleaning Services Availability: Adelaide’s cleaning service providers cater to the diverse needs of the city’s populace. Availability and expertise can influence the cost of tile and grout cleaning. It’s essential to consider local cleaning services that align with Adelaide’s unique architectural landscape and are well-versed in dealing with the specific challenges posed by the city’s tiles.
How Much Does it Cost to Clean Tile and Grout

We Use Adelaide’s Specialized Tile and Grout Cleaning Techniques

  • Adapting to Heritage Tiles: Adelaide’s historical buildings often feature intricate heritage tiles that hold immense historical and cultural value. Cleaning these tiles requires a delicate touch to preserve their authenticity while ensuring their cleanliness. Specialized techniques, such as gentle restoration and hand-cleaning, play a significant role in maintaining the charm of Adelaide’s heritage.
  • Sustainable Cleaning in Eco-Conscious Adelaide: Adelaide’s commitment to sustainability is reflected even in its cleaning methods. With a citywide focus on environmental consciousness, City Tile And Grout Cleaning Services in Adelaide are increasingly adopting eco-friendly cleaning solutions. This not only ensures a greener approach to maintenance but also aligns with the values of the city’s residents.
  • Professional Touch for Commercial Spaces: Adelaide’s commercial spaces, whether they’re the vibrant stalls of the Adelaide Central Market or the stylish cafes along Rundle Street, see a constant influx of visitors. The importance of regular tile and grout cleaning and maintaining a clean and welcoming environment cannot be overstated. Professional cleaning services bring their expertise to ensure these spaces remain appealing and hygienic.

Cost-Effectiveness: Hiring Professionals in Adelaide vs. DIY

While DIY methods might initially appear cost-effective, the true value of professional cleaning services lies in their comprehensive approach. Professionals possess the necessary tools, expertise, and knowledge to deliver a deep and thorough clean, extending the life of tiles and grout. The tile and grout cleaning price for professional services often pays off through improved aesthetics, longevity, and reduced need for frequent cleaning.

Beyond Cleaning: Additional Services Elevating Adelaide’s Tiles

Restoring Historical Elegance: Adelaide’s historical sites and heritage buildings often feature tiles that have stood the test of time. However, exposure to the elements can lead to wear and fading. Restoration services not only breathe new life into these tiles but also contribute to the preservation of Adelaide’s historical elegance.

Grout Recoloring to Suit Adelaide’s Aesthetics: Grout recolouring is an innovative technique that can revitalize the appearance of tiles. By changing the colour of grout lines, it’s possible to achieve a fresh and modern look that complements Adelaide’s evolving architectural trends.

Estimating Tile and Grout Cleaning Costs in Adelaide

Since you know from above various factors that determine tile and grout cleaning cost, you can easily calculate “How Much Does it Cost to Clean Tile and Grout?” for your needs. The cost of tile and grout cleaning in Adelaide varies based on a range of factors, including the type of tiles, the extent of dirt and staining, the area to be cleaned, and the specific cleaning method employed. On average, professional cleaning services in Adelaide may charge between $9 to $11 per square foot. These costs ensure not only cleanliness but also the preservation of the tiles’ integrity.

Keeping Adelaide’s Tiles Gleaming: Practical Maintenance Tips

Maintaining the lustre of Adelaide’s tiles requires consistent care. Regular sweeping and gentle mopping can help prevent dirt buildup, while prompt attention to spills minimizes staining. These small steps can significantly extend the time between professional cleaning sessions.

Navigating Adelaide’s Cleaning Service Providers

Choosing the right cleaning service is crucial to ensure the longevity and beauty of Adelaide’s tiles. Local expertise, positive reviews, and a commitment to reasonable tile and grout cleaning prices and sustainable practices are key indicators of a reputable cleaning service provider like City Tile and Grout Cleaning in Adelaide.

Conclusion: Preserving Adelaide’s Tile Beauty

As we conclude this journey through Adelaide’s tile and grout cleaning landscape, one thing remains clear: the city’s tiles are more than just surfaces; they are integral parts of the city’s identity. By understanding the factors that influence tile and grout cleaning costs and by embracing professional cleaning services, Adelaide’s residents and business owners contribute to the preservation of the city’s tile beauty for generations to come.

Any home would look great with tile flooring, and keeping the tiles and grout clean is an important part of home maintenance. Even though it might appear easy, tile and grout cleaning is a delicate activity, therefore you may need professional help. Considering their longevity, aesthetic appeal, and ease of maintenance, tiles, and grout are frequently used in residential and commercial settings. Although they are tough, they still need to be cleaned frequently to keep their appearance and functionality. In this blog post, we’ll discuss the Importance of Regular Tile and Grout Cleaning as well as the advantages it offers your home or workplace.

The Importance of Regular Tile and Grout Cleaning

The Importance of Regular Tile and Grout Cleaning

Increased Durability Of The Floor

A tile floor will survive longer if you keep it clean. As dirt accumulates on the tiles, the seal may be harmed and the filth may begin to penetrate the tiles. Since tile floors are so expensive, you should do everything in your power to increase their lifespan. Since existing materials must be removed and the ground may need to be restored, installing a tile floor can be time- and money-consuming. You can avoid the trouble of having to pay to install new flooring by having your tile floors professionally cleaned to extend their longevity.

Safety And Slip-Free Tiles

The floor made of tile and grout may become slick if dirt, grease, and other particles are allowed to accumulate there. Someone might trip and get hurt if this happens. A tile floor will have enough traction if kept clean to not be hazardous. To keep you and anybody who uses your floor safe, use tile and grout cleaners regularly. Neglecting to clean and putting yourself at risk of an accident is not worth it. Maintenance is necessary because slippery tile floors can be quite dangerous.

Enhanced Floor Appearance

You should be proud to show off your tile floors to visitors, but when they get dirty, they won’t leave as nice of an impression. You should employ a tile and grout cleaning company to assist you preserve the beauty of your flooring if you want to keep the tile floors looking their most impressive. Cleaning the ground with a mop will assist to clean the tiles, but the unclean mop water will soak into the grout, making it much dirtier. Professional cleaners are better equipped than you are to restore the grout to its proper appearance. This is one of the importance of regular tile and grout cleaning.

A Better Indoor Environment

Dust and allergens can be released into the air by dirty tiles and grout, which lowers the quality of the air inside a building. By removing these particles via routine cleaning, your house or workplace will have cleaner, healthier air. This is crucial for those who suffer from allergies or respiratory diseases, as cleaner air can reduce symptoms and improve general health.

Cleanliness Of The Home Or Workplace

Various pollutants, such as food particles, bacteria, and allergies, are exposed to tiles and grout in places like bathrooms and kitchens. These toxins can endanger your health and make your space less clean. By removing these contaminants and lowering the risk of diseases or allergies, routine cleaning maintains a hygienic environment.

Keeping Mildew & Mould From Growing: 

Grout lines, which are naturally porous, make an excellent environment for mould and mildew to grow. The moist and humid conditions that these fungi prefer make kitchens and bathrooms particularly vulnerable. To protect your health and maintain the strength of your tiles, regular grout cleaning and maintenance can stop the growth of mould and mildew.

Conclusion: The Importance of Regular Tile and Grout Cleaning

In this blog, we City Carpet Cleaning have covered the importance of regular tile and grout cleaning. For your living or working environment to remain attractive, durable, and hygienic, regular tile and grout cleaning is essential. You can enjoy clean, aesthetically pleasing tiles, stop mould and mildew from growing, extend the life of your flooring, and foster a healthier atmosphere for you and those around you by spending time and effort on regular maintenance. To benefit from this and maintain the value of your investment, incorporate periodic tile and grout cleaning into your daily routine.

Maintaining Freshness: How Often Should You Steam Clean Your Carpets?

How Often Should I Steam Clean My Carpets? If you are someone who doesn’t know the benefits of steam cleaning or what it can do to your carpets, then this blog is going to be extremely helpful. In this, we are going to discuss the frequency of getting carpet steam cleaning services. And how it helps in keeping the carpets in good condition.

You will learn “How often should I have my carpets steam cleaned?” Since carpets accumulate a lot of dirt or gunk particles, it becomes necessary for people to take care of them. But there are other cleaning methods like dry cleaning, instead, why should people opt for steam carpet cleaning? Depending on the type of carpet and the fabric, one can simply opt for carpet steam cleaning. 

How Often Should I Steam Clean My Carpets

How To Decide If Your Carpet Needs Steam Cleaning? 

Steam cleaning is considered to be the best way to keep your carpets clean and free from dust particles. But how often should I have my carpets steam cleaned? To find an answer to this question, one should understand various factors that will indicate the requirement of the carpet steam cleaning service. Despite the benefits, overdoing steam cleaning can also give bad outcomes. So, by analyzing the following aspects, one should be able to understand if the carpet needs steam cleaning or not

  • Dependent On Foot Traffic: It majorly depends on the foot traffic which is crucial to analyze if the carpet needs steam cleaning or not. If the carpet is laid in high-traffic areas, then it will result in accumulating a lot of dirt and junk particles. Along with this, the carpet can also develop stubborn stains. So, to eliminate all these junk particles and to make the carpets tidy it is usually ideal to steam clean the carpet once every 6-8 months. 
  • Frequent Allergies And Concerns: If you come across frequent allergies and disease conditions in your family, then it might be due to the piling up of dirt particles on the carpets. This indicates that your carpet needs deep cleaning right away. That’s when one should realize that it’s time to get the cleaning done professionally. Getting professional steam carpet cleaning services have many benefits. 
  • Analyze The Activities In Your Household: Every household is different and no two houses have the same kind of activities going on, daily. Be it with your pets or kids, it can be chaotic some days and manageable on the other day. These factors collectively influence the dirt accumulation on your carpets. So, analyzing these activities and the adversity of it will directly help you in understanding if your carpets need steam cleaning. Accordingly, you can easily take the right call. 
  • Following The Manufacturer’s Instructions: Making sure that you take better care of the manufacturing instructions and getting regular maintenance services is necessary. Depending on the type of your carpet, the manufacturer will provide you with certain guidelines that need to be followed. This includes the cleaning instructions and the frequency of getting carpet steam cleaning service. In addition, the cleaning patterns might alter from one type to another, so manufacturers at times will help their customers track the information as per their warranty terms, etc. 
  • Unforeseen Accidents: Sometimes there are liquid or food spillages or any other unforeseen events on your carpet, that’s when it is important to take immediate action and seek cleaning services. Most of the time it has to be steam cleaning because of the results it can bring out. All these will eventually decide the number of times your carpet should be cleaned.
  • By The Way Your Carpet Looks: The way your carpet appears can be the major determining factor with which one can identify the need for steam cleaning. With the piling up of dirt and other junk particles, the carpet might lose its shine or start to look dull and dirty. This is the reason for dirt accumulating on the carpet. Hence, it is vital to take this event seriously and take necessary actions. This can help in attaining the best results and steam cleaning can thoroughly eliminate the dirt and other junk particles. 
  • Wicking: It is the scenario where dirt and stains are resurfaced after steam cleaning because of the wicking. This is the outcome of inefficient cleaning or even if the cleaning was superficial and the dirt was removed from the surface layers. The dirt and stains that are retained in the deeper layers can reappear eventually when the carpet dries. So, a thorough steam cleaning session can help restore the look of the carpet. 
  • Maintaining Regular Cleaning Schedules: Without considering any odds or analysis, maintaining a regular cleaning schedule also helps. This includes a customized cleaning pattern that is curated for the particular carpet type. Consistency is the key and is completely applicable when it comes to maintaining carpets. 

Conclusion

Based on various factors that are mentioned above, one can simply plan regular cleaning schedules. And it is quite important to stick to it. Regular patterns of cleaning prevent the accumulation of dirt and also ensures that the carpets are in good condition. Hopefully, this guide helped you in understanding the frequent question “How often should I have my carpets steam cleaned? ” All these factors can individually or collectively help you in understanding the necessity of getting carpet steam cleaning. Eventually one can analyze the needs of the carpet and that’s when you would be able to decide how often someone needs to get the steam cleaning services. 

How to clean a shaggy rug?

Shaggy rugs are thick fabric rugs characterised by a longer pile length. They are also called ‘Noodles’ due to their noodle-like shape. Many people choose them due to their soft texture and relaxed and casual feel. They are stylish and luxurious in appearance and are durable and can be easily maintained. They are available in a wide variety of shapes and colours. In spite of all these advantages, their cleaning is a very challenging task especially if they are made of wool and silk. That is why, here is the ultimate guide for How To Clean A Shaggy Rug which helps completely in removing pet hair, deep-seated dirt, and stains. 

How to Clean a Shaggy Rug

How to clean a shaggy rug? A Step-by-step Cleaning Guide

After prolonged use, lots of dust and dirt gets accumulated inside your shaggy rug due to heavy traffic and many other reasons, thereby, making it dull in appearance. Thus, here is the step-by-step guide to cleaning your rug and for regular maintenance. It is given below:

  1. Gather essential tools and other materials: For the cleaning to be started, you must have some necessary tools like a Vacuum cleaner with a brush attached to it, for the removal of accumulated dust and other debris on the rug, a mild detergent with warm water and a soft cloth for blotting of stain, clean towels, a broom or a soft bristle brush to remove any trapped dirt and debris that may have missed by the vacuum cleaner, white vinegar, and a film or protective mat to be placed beneath the rug while cleaning. After gathering all these tools, clean the area and remove all the accessories inside your room to make it empty for rug cleaning.
  1. Shaking and vacuuming: Take out your rug and shake it as it loosens all the dust and debris and removes it. After this attach the brush with your vacuum cleaner and remove the trapped dirt by vacuuming in the direction of the fibres from both sides.
  1. Spot cleaning: In case of spots and stains, quickly blot the affected area with a clean towel or paper towel to remove the excess water. Make a clear solution of mild detergent in warm water and apply a small amount of it over the stains to make sure that it does not cause any discolouration or damage. Then apply it with a soft sponge or cloth to blot the stain without spreading as it will cause damage to the rug fibres. Rinse it with clean water and keep it dry.
  1. Deep cleaning: For deep cleaning a shaggy rug, you must check and first determine the type of rug, some are hand washable while some are machine washable. If it is washable then make a solution of mild detergent and warm water in a large tub and gently rub the rug inside it without twisting it, Then rinse it with clean water and keep it dry. In the case of machine washable rugs, take cold water in a large capacity washing machine with a mild detergent on the basis of the fabric of the shrug. Wash it properly and keep it dry.
  1. Drying: After all the cleaning procedures, dry the rug by laying it on a flat and clean surface and dry it in a well-ventilated area without any direct exposure to sunlight as it may cause fading. Immediate drying prevents the growth of moulds and mildews on it.

By following the above steps, you can always make your rug clean and luxurious.

Preventive Measures For Proper Maintenance Of Your Rug

Cleaning is a one-time procedure for the elimination of dirt and dust from it, but you have to follow some of the preventive measures that you can always use for proper maintenance of your rug. By using these measures, you can always make your rug look delicate and luxurious. Some of the preventive measures and tips are given below:

  1. Vacuum regularly

To prevent the accumulation of dust and dirt, you have to vacuum your rugs regularly, at least once a week with the help of a rotating brush or vacuum cleaner. This will also remove pet hairs and dirt from the deep fibres.

  1. Remove shoes

You and your family members should make it a habit to permanently remove your shoes before entering your home. Also, tell your guests to do it. This will prevent a huge amount of dust from coming inside and prevent your rug from getting dirty.

  1. Always do brushing and grooming

Regular grooming and brushing prevent the trapping of dirt and other debris into your rug, thereby, making it clean and fluffy.

  1. Use a rug pad

First of all, it makes a barrier between your rug and the floor that helps in the prevention of the setting of dirt and dust under it. This also prevents slipping and sliding and makes it comfortable to walk on.

  1. Clean spills immediately

It is a gentle and protective behaviour to clean all the spills as soon as it occurs to prevent them from soaking into the rug fibres. Avoid rubbing as it may cause stains to absorb deep into the rug.

  1. Rotate the rug

By rotating the rug, foot traffic is evenly distributed and prevents the rug from wear and tear.

How Often Should You Clean Your Shaggy Rug?

You can clean your shaggy rug properly to prevent it from dust and dirt that get easily trapped inside the fibres of the rug. There is no recommended day to clean a rug but in general, you can clean a rug at least every six months. This will give the best results and prevent all types of damage as it maintains the quality and appearance and improves the shelf life.

Conclusion

How to Clean a Shaggy Rug? The above step-by-step guide gives you an idea about How To Clean A Shaggy Rug in the best possible ways that provide you with deep cleaning. Some preventive measures are also suggested for the cleaning and maintenance of rugs. It is best to clean the rugs every six months. But for deep cleaning of rugs, hiring professionals is the safest and most effective way.

Having problems after the flood is common but how to handle them is very necessary. Water damage can affect your property as well as it can cause damage. To fix all walls or dry them, it’s essential to address water damage in walls. So, you will be capable of avoiding additional structural deterioration, and the growth of mould, and preventing significant health risks. In this blog, we will discuss How Long Does It Take To Dry Out Walls From Water Damage? Well, the length of time needed to dry out water-damaged walls depends on how well you understand the drying process. So, let’s start and know about multiple factors that will really help you in drying the water-damaged walls. 

Causes of Water Damage 

Numerous things can cause water damage, including leaked pipes, roof leaks, floods, and broken appliances. The amount of water, how long it was exposed, and the area impacted all determine how much damage is done. So, always check the cause of water damage before you go for water damage restoration

How Long Does It Take To Dry Out Walls From Water Damage?

Factors Affecting Drying Time

The following factors may affect how quickly walls dry after you deal with the water damage:

  • Type of water damage: The category or type of water damage (clean water, grey water, or black water); and the level of saturation have an influence on the drying time. If your walls are damaged by black water, you need to be really concerned about this because you need proper wall water damage repair
  • Building materials and construction: The place at which certain materials, such as drywall, plaster, or concrete, dry out differs depending on how they absorb water. How the wall is built, the amount of insulation and the existence of vapour may all affect how quickly a wall dries.
  • Environmental and climatic factors: Air movement, temperature, and humidity all have a significant impact when you go for How long does it take to dry out walls from water damage? The evaporation and drying processes can be increased in warm, dry surroundings but they are slowed down in cold, damp ones.
  • DIY vs professional working: Professional water damage repair companies have specialised tools and know-how to speed up the drying procedure. Depending on the tools and skills at hand, company experts can decrease the time, but it may take longer if you try to do it by yourself.

Steps Of Drying Out Walls From Water Damage 

The flooded wall drying process generally involves the following steps:

  • Initial inspection and water removal: You can also work on locating and halting the source of water damage; removing any extra moisture or standing water from the afflicted region. This initial inspection and flood water removal after getting flooded walls can help you to dry the flooded walls fastly.
  • Moisture detection and monitoring: Measuring the amount of moisture in the walls, floors, and other impacted surfaces can really help you. You can use moisture metres and other equipment to dry out the flooded walls. Before you go for water damage repair specialists, you can do regular observation as; it helps in monitoring the drying process.
  • Structural drying techniques: By using techniques such as air movers, dehumidifiers, heaters, or fans to enhance evaporation and airflow, you can dry the wall structure. Hence, this will be a beneficial tip for speeding up the drying process.
  • Mould prevention and remediation: Taking the appropriate precautions to stop mould development or taking care of any mould problems can also help. This is because wet or moisture can produce mould or mildew and you can not easily remove them. For this, you can hire a flood mould removal service

Expected Drying Timeframes

Depending on the situation, drying out water-damaged walls might take a variety of times:

  • Time estimates for various water damage types: More water damage may take many weeks to dry and on the other hand minor water damage may take a few days. Even longer drying durations may be necessary in severe situations. So, always be sure that you are getting expert help in water extraction or flood water removal. 
  • Factors that might hasten or delay the drying process: Some elements or factors that can affect the total drying time like; the level of the damage, the surrounding environment, ventilation, the equipment used in the drying, & the speed of the process.

Benefits of Professional Drying Services To Dry Flooded Walls

Hiring professionals for water damage restoration and wall drying offers several benefits and you can really speed up the process with this:

  • The ability of experts: The ability to handle water damage and dry walls properly and efficiently is one advantage of working with specialists.
  • Use of the best wall drying process: Professionals use the following steps in their drying process: a thorough inspection, water extraction, moisture detection, structural drying, mould prevention, and water damage restoration.
  • Availability of required wall drying equipment: The value of the drying equipment needed is too much. Without that, nobody knows how much time it can take for drying. 

DIY Water Damaged Wall Drying Techniques

While hiring flood damage repair specialists is recommended for extensive damage in flooded walls, some may opt for DIY drying methods:

  • Safety measurements: Protection clothing, suitable ventilation, and the right tools for water extraction, drying, and monitoring are all necessary safety measures and equipment.
  • Procedures to follow for efficient drying: Removing the water, improving air circulation, lowering humidity, and routinely checking moisture levels, you can own these tips if you don’t want to hire professionals.
  • DIY drying’s drawbacks and potential risks: Well, you may cause more damage because of insufficient specialised tools and knowledge. Without professional wall water damage repair, you may risk the property. So, we suggest not trying to repair major water damage in your property. 

Conclusion: How Long Does It Take To Dry Out Walls From Water Damage?

Response time is essential when dealing with water damage to walls. The type of damage, the materials used in the construction, the environment, and professional assistance can all have a big influence on How long does it take to dry out walls from water damage. Considering the extent of the damage and the resources can help you to decide whether to work with experts or try DIY solutions. Regardless of the method selected, it is very important to deal with water damage quickly. So, you can easily prevent potential damages and issues and effectively restore the affected wall area.

How much does carpet cleaning cost?

Introduction: Carpet cleaning is a meticulous task that demands effort, time, and expertise. Hiring professionals equipped with the necessary skills and tools is essential for achieving optimal results. The cost of carpet cleaning in Adelaide can vary depending on the service provider and the level of service chosen. This blog “Carpet Cleaning Adelaide Price” aims to delve into the details of carpet cleaning prices in Adelaide, shedding light on the factors that influence the costs involved.

Carpet Cleaning Adelaide Price

Factors Affecting Carpet Cleaning Prices in Adelaide:

Before exploring the Carpet Cleaning Adelaide Price details, it is crucial to consider various factors that impact the overall cost of professional carpet cleaning services in Adelaide. These factors include:

Room Size and Square Footage:

Carpet cleaning prices in Adelaide are often determined based on the size of the room or the square footage. Larger areas may require more time and effort, resulting in higher costs. The following price ranges are typically observed:

Single Room Cleaning:– The average cost of cleaning a single room’s carpet in Adelaide ranges from $25 to $100, with an average price of $55.

Square Footage Pricing: The industry standard for carpet cleaning prices is between $0.15 and $0.50 per square foot. Based on this pricing, the following ranges can be expected:

  • 200-650 square feet: $80-$100
  • 650-1000 square feet: $99-$250
  • 1000-1800 square feet: $250-$450
  • 1800-3000 square feet: $500-$800

Location: Carpet cleaning prices may vary between different cities in Australia. Adelaide, Melbourne, Sydney, Perth, Canberra, and Brisbane each have their average price ranges due to varying market conditions and competition.

Additional Considerations: Several additional factors can impact the cost of carpet cleaning in Adelaide. These include:

  • Number of Rooms: The total number of rooms requiring cleaning will influence the overall cost.
  • Carpet Type and Condition: Different carpet types and their conditions may require specific cleaning methods, affecting the pricing structure.
  • Accessibility: The ease of access to the carpeted area and the complexity of the cleaning task can influence the pricing.
  • Urgency: If a quick turnaround time is required for the cleaning job, it may affect the pricing.
  • Preferred Cleaning Method: Different cleaning techniques, such as steam cleaning, dry cleaning, carpet shampooing, or carbonated water cleaning, may have varying price ranges.

Detailed Carpet Cleaning Techniques and Prices

Here is a breakdown of the most commonly employed carpet cleaning techniques in Adelaide and their associated prices:

Hot Water Extraction or Steam Cleaning: This method is ideal for deep cleaning to eliminate pet dander, stains, and odors. The process involves pre-treating the carpets and thoroughly washing them with pressurized hot water. The estimated costs for steam cleaning are as follows:

1000 square feet: $100-$200

1000-1400 square feet: $300-$400

2000 square feet: $500-$1500

Dry Cleaning: Dry carpet cleaning is preferred for high-traffic areas as it eliminates the need for extended drying time. A specialized powder is applied to the carpets and agitated with a counter-rotating brush. The average cost for dry carpet cleaning in a standard-sized room ranges from $80 to $350.

Carpet Shampooing: Carpet shampooing is effective for removing tough stains and accidents. The process involves creating a foam that absorbs and disinfects the carpets. However, it consumes a significant amount of water and requires a longer drying time. The cost of carpet shampooing for a standard-sized room typically ranges from $80 to $400.

Carpet Cleaning with Carbonated Water: This newer method minimizes water usage during the washing and rinsing process. It is often preferred by businesses with heavy foot traffic. The cost of carpet cleaning with carbonated water for a standard-sized room ranges from $130 to $560.

Carpet Types and Pricing

Different carpet types have varying cleaning requirements, which can affect the cost. Here’s an overview of carpet types and their associated price ranges for a standard-sized room:

  • Berber Carpets: Known for their ease of cleaning, Berber carpets are relatively affordable, with prices averaging around $90.
  • Cut & Level Loop Carpets: Cleaning cut and level loop carpets require more effort, resulting in a price range of $65 to $125.
  • Wool and Cotton Carpets: Cleaning wool and cotton carpets are more challenging, which reflects in their higher price range of $100 to $160.

Additional Costs

Certain additional factors may incur extra charges for carpet cleaning services:

  • Stairs with Carpet: If your stairs are carpeted, some cleaning companies may charge an additional fee of $2 to $3 per step.
  • Stain and Pet Spill Removal: Stubborn stains caused by ink spills, wine, coffee, or pet accidents may require specialized treatment, leading to additional costs. The price for stain removal varies based on the size and complexity of the stain, ranging from $35 to $300.

Conclusion: Carpet Cleaning Adelaide Price

Carpet Cleaning Adelaide Price: Professional carpet cleaning services in Adelaide offer numerous benefits, including stain removal and prolonging the lifespan of your carpets. It is vital to hire experts who can provide quality cleaning at a reasonable cost. By understanding the factors that influence carpet cleaning prices, such as room size, carpet type, and preferred cleaning technique, you can make an informed decision and ensure the longevity of your carpets.

Common Signs Of Dirty Blinds & Cleaning Tips

Blinds are another form of window coverings and decorative. However, there comes a time when you need to know about common signs of dirty blinds and cleaning tips to make them look fresh and neat. Knowing the signs of dirty blinds plays a major role before implementing a cleaning tip on them. Like curtains, blinds also have hidden dangers and should be cleaned in a timely fashion. Therefore, take note of the signs and blinds cleaning tips we mentioned in this blog and follow them accordingly for clean blinds. 

Blind cleaning tips

Look To Know Signs Of Dirty Blinds And Their Respective Cleaning Tips 

In regards to signs of dirty blinds, we listed out a few cleaning tips for your aid. Look below to know common signs of dirty blinds & cleaning tips: 

1. Dust Build-up: A visible cover of dust covering the slots is one of the most obvious signs of dirty blinds. Your blinds may look dull and ugly as a result of dust particles that build on the surface over time. Additionally, it’s another indication that you require the blinds cleaned if you run your hands down the slats and see dust remaining in your hand.

  • Start by fully closing the blinds to remove dust. To carefully sweep the dust off each slat, use a feather brush, microfiber cloth, or a vacuum with a brush attachment. Make sure to properly clean the blinds on both sides.
  • However, one thing you have to keep in your mind is that cleaning dusted blinds with lint rollers or cloth dusters emits lots of dust. So, mask yourself first and avoid getting dust allergies. 
  • After following all the necessary precautions, use either a lint roller or cloth duster to clean the blinds thoroughly.

2. Stubborn Stains

Another clear sign of dirty blinds is stains and patches. These can result from a variety of things, such as pet mishaps, or ordinary wear and tear. In addition to being ugly, stains can also contain allergies and bacteria. Blinds get stains from grease, sunlight, water, and so on. Once these common stains turn into stubborn ones and your task of getting rid of them becomes harder. Moreover, stains also make blinds lose their appearance in a very short time. However, if you want to know how to clean blinds for stain removal, continue reading to get the job done right.

  • You can use a light detergent or a solution of water and vinegar to spot clean stains on a wide range of blind types. Being cautious not to wet the material, gently dab the soiled area with the solution using a clean cloth. Use a fresh cloth to blot the surface dry or let it air dry.
  • However, if you still find the stains, repeat the complete process over and through until there are no more stains. 

3. Unpleasant Odours

It’s a clue that you require cleaning if you detect a musty or unpleasant smell next to them. Odours can stay on the blinds as a result of dust, pet hair, and other airborne debris that may collect on them over time. On exposure to sunlight, dust particles, smoke, and others, blinds eventually become pleasant and unusual. And vacuuming is not an answer to get rid of these unpleasant odours coming from blinds. Follow our lead to know the cleaning tip for blind odour removal.

  • For odour removal from blinds, you need materials like baking soda, vinegar, water, a clean cloth, and a few rags.
  • Prepare a solution of equal parts water and vinegar to clean your blinds and get rid of odours. Use a sponge or cloth to lightly soak it in the solution, then wipe all of it down. The vinegar leaves behind a fresh aroma and aids in odour neutralisation.
  • Repeat the process of wiping on both sides of the blinds with this cloth and then wipe again using a dry rag. 

4. Patches Of Mould

If the environment around them is humid, then blinds encourage the growth of mould because of the presence of moisture. Humid temperature leads to condensation on blinds and this in turn accumulates water droplets. Therefore, dust coming in contact with water grows into moulds of different colours. But we have a solution to remove mould from blinds.

  • To remove excess dry mould, you need to first vacuum the blinds on both sides and then brush away the slabs
  • After removing excess dry mould, you need to make a mild solution by using lemon juice with salt 
  • Next to making a perfect mild solution, use a clean soft cloth to gently wipe the blind slabs to remove mould on them
  • This cleaning tip not just removes mould but also the musty smell mould releases. 

5. Pet Hair And Dander

One of the pesky tasks in blind cleaning is to remove pet hair and dander as they are very small appearance-wise. Despite the necessary actions you take to keep your blinds free of pet hair and dander, you cannot escape from this situation. Therefore, you should always be ready to adopt a cleaning tip to reduce or completely remove pet hair and dander. 

  • Wear rubber gloves to first wipe the slabs and then get rid of pet hair off the blind surfaces. This way you get to remove a good amount of pet hair 
  • But when getting rid of pet dander, direct removal is not possible even if you take the necessary precautions
  • For removing pet dander, you need to use a vacuum cleaner that has HEPA filters as they help in pulling dander out of blinds
  • Now, use the above-mentioned vacuum cleaner to gently vacuum the blinds to pull away pet dander from the core of the blinds. 

6. Change In Blind Colours 

Over long-time exposure to sunlight and UV rays, blinds tend to lose their original colours to become yellow or brown. Changing of blind colour will make even your new blinds look like the old ones. But this doesn’t mean that replacing them with new ones is the only alternative. Because you have the best option on how to clean blinds and make them appear shiny as new. 

  • Make your colour-changed blinds regain their former colour by cleanly wiping them with soaked water; on both sides
  • Let the blinds dry until you find not even a single droplet of water on them
  • After the wiping step, you will find no more surface dust or dirt and only find changes in the colour of the blinds
  • Here, the final step is to paint those window blinds carefully by spraying the colour you choose and save your money from blinds replacement.

Conclusion 

To keep blinds looking good and extend their lifespan, regular blinds cleaning services are necessary. You can keep your blinds in top shape by keeping an eye out for usual symptoms of dirt, such as dust accumulation, stains, grease, and odours. To maintain your blinds fresh, spotless, and aesthetically pleasing, refer to the cleaning procedures provided in this blog post. If you are still dealing with how to clean blinds, contact a professional blind cleaning service for your ease.

How To Deodorize And Freshen A Mattress: 5 Fresh Tips

A mattress needs routine maintenance to let you lead an allergen-free, safe, and healthy lifestyle. Usually, sweat and dead skin cells that we shade while sleeping can invite allergens and dust mites. As a result, you and your family members, especially kids, can get sick more often with symptoms like runny nose, watery eyes, skin rashes, sore throat, and even breathing difficulties. In addition, the dust, dirt, and moisture build-up can even release a foul odour, which may linger in every corner of your room. In this blog our expert provide information How To Deodorise and Freshen A Mattress?

That is why you must add cleaning and deodorising your mattress to your routine household chores. Moisture inside a mattress encourages the growth of mould and mildew, making the bed unsuitable for sleep. In this blog, we will discuss the easiest procedures for mattress deodorizing, freshening and mattress cleaning for all types of mattresses. To help you out in this matter, our mattress cleaning expert has shared some secret tips that can freshen and deodorise your mattress excellently in one single attempt!

freshen-and-deodorize-a-mattress

5 Fresh Tips To Clean And Deodorise A Mattress

Here are 6 tips for healthy mattress cleaning, odour removal and deodorisation at home:

1.Prefer Dry Cleaning Agents More Than The Liquid Ones

Before involving yourself in the mattress freshening program, make sure not to use any liquid cleaning agents. The residues from liquid cleaning products can lead to moisture retention in the mattress, resulting in mould growth. If your mattress has already become the victim of mould infestation, you must immediately seek professional mattress mould removal treatment to remove it and prevent further growth.

Anyway, coming back to where we were, to prevent the risks of mould and mildew growth, professionals suggest going with dry cleaning methods. In case you want to use liquid cleansers, air dry the mattress immediately to halt the moisture sitting deep into the fibre. 

2.Start With Vacuuming To Freshen Up Your Mattress

To begin with, vacuum your mattress in normal mode to remove the loose dirt and surface soil. And before vacuuming, make sure to clean the upholstery attachment as well as the surface sides of the bed using warm water. Else the dust and germs accumulated in those parts can spread into your freshly-vacuumed mattress, spoiling your whole effort. While vacuuming, make sure each side of the mattress is equally treated.

3.Deodorise Your Mattress With Simple Kitchen Ingredients

Dust, sweat, and allergens altogether form a terrible odour that can make you feel nauseous and woozy. But worry not these are some amazing mattress cleaning tips to eliminate the foul odour using only kitchen ingredients! You can consider these 4 additional tips for your mattress odour removal. 

  • Baking Soda
  • Baking soda is an excellent ingredient that neutralises any odour in seconds. Besides keeping it inside your refrigerator, you can use it to remove the terrible smell of your mattresses too! Just sprinkle it throughout your mattress on both sides and wait for at least 30 mins. The longer you wait, the better result you can get! You can even leave it for 24 hours if possible. And during the process, keep the mattress near your window so that it can get some natural light. The sunlight soaks the excess moisture while baking soda removes the odour. At last, vacuum up your mattress to remove all the residue, and make your mattress fresh-smelling once again. Well, baking soda is great for removing urine stains and remove mattress odours, especially if the area is still wet.

  • Corn Starch
  • Sometimes a mattress can get greasy because of body oil and starts to emit a disgusting odour. In such cases, using corn starch could be a fantastic option! All you need to do is mix baking soda and cornstarch in the same ratio and sprinkle the mixture all over your mattress. Leave the mixture for around 24 hours and vacuum it the next day.

  • Essential Oils for Tempting Fragrance
  • Baking soda only neutralises the odours and freshens up your mattress. But if you want your mattress to smell good, then you can try out the essential oil hack! Take any of your favourite essential oil, like lemon, peppermint, eucalyptus, and lavender, and add 15 to 20 drops to the baking powder before sprinkling it on your mattress. For omitting stains along with odour, make hydrogen peroxide and baking soda solution by adding both ingredients in a 2:1 ratio and then mix 15-20 drops of your favourite essential oil. Spray it all over the mattress and let it air dry, and see the magic yourself! These essential oil solutions work as natural mattress fresheners.

  • Water-Vinegar Solution

Vinegar does not only enhance the flavours of foods, but it also works great in removing any kind of odour. So, instead of spending money on chemical-based deodorisers, make your natural mattress fresheners using water and white vinegar! Mix both ingredients in equal amounts and pour them into a spray bottle. Then spray the solution throughout your mattress lightly. 

4. Increase Air Circulation

Increasing airflow within the mattress and throughout your bedroom will help keep your mattress feeling fresh. Mould and mildew can grow more readily inside your mattress if moisture and warmth accumulate there. Additionally, it’s not a bad idea to open a window and let some natural light into the space because the sun’s UV rays can assist in both mattress deodorizing and destroying bacteria on your bed.

5. Keep Your Mattress Outside in the Sun: 

Sunlight’s UV rays, which stop germs from growing by harming their cells and eradicating dust mites, operate as a natural disinfectant. Drag your mattress outside to a clean, dry location in the sun after vacuuming it and freshening it up. Bring the mattress inside after leaving it outside for about six hours. Just be sure to pick a day with plenty of sunshine, little humidity, and no danger of precipitation. Keep in mind that a wet mattress can promote the growth of mould and damage your bed!

Final Words

Don’t wait if your mattress begins to smell; solve the issue right away. You can simply maintain the fresh scent of your mattress for many years by using this simple mattress freshening home remedy. Next time, save yourself the hassle by spending money on a top-notch mattress protector. Because stains can break your warranty, many manufacturers actively advise against using them, so you can rest well knowing you’re protected.

How to Clean Up After Bedwetting?

There are so many types of mattresses and all of them need special care and regular cleaning to last them longer and keep them clean for a long time. Pee, vomit and other accidents during the day or night are a normal part of growing up. When a youngster wets the bed, it might be problematic, but it’s crucial to know how to clean a child’s mattress properly. To avoid mattress stains and odour remaining, you need to fix the issue immediately. For bedwetting cleanup, you’ll need a good plan, but if time is of the basic terms, you should look for a means to absorb the extra liquid. There are various ways of cleaning your child’s mattress for bedding maintenance. To know in detail about how to clean up after bedwetting, read the blog completely.

Clean Up After Bedwetting

How to Clean Up After Bedwetting?

Here is a quick guide on how to clean a mattress after the bedwetting and odour-elimination process:

Step 1- Act Quickly- This is the most important step you need to take care of while cleaning the mattress. As soon as you see any urine stains on your child’s mattress, you must act quickly and try to get rid of them as soon as possible. You can use a dry cloth to blot away the excess urine from the mattress. 

Step 2- Remove Sheets And Bedding- Before you start cleaning the mattress and stain removal process, you must clean the bedsheets and pillow covers. You can remove that and put them in a washing machine and send them for a spin. Make sure the detergent is mild and safe for cleaning the bedsheets and pillow covers. This will help in getting rid of the smell as well as stains from the bedsheets. 

Step 3- Gather The Belongings- For bedwetting cleanup, you will require many things such as water, vinegar, baking soda, cleaning detergent, a spray bottle, a dry cloth, and a vacuum cleaner with a hose attachment. You may also require a blow dryer to dry after the mattress steam cleaning. These are the basic things required to clean a mattress. 

Step 4- Blot The Stain- Once you gather all the important things, you must blot the excess urine using a dry cloth. Slowly blot the area but make sure you don’t scrub or rub on the stains as it might spread the urine to all the parts and might also move it deep into the mattress for stain removal

Step 5- Create And Apply The Mixture Of Water And Vinegar- Create a mixture of 2 parts of cold water, 1 part of vinegar, and a little detergent in a spray bottle and spray it on the stains. Make sure to cover all the areas and wait for around 15 minutes until the solution gets settled on the stains. 

Step 6- Dry The Area- Once the solution gets settled on the mattress, you can wait for 15-20 minutes and then blot the area properly using a dry towel. Drying with a towel will help you in getting rid of excess liquid from the mattress. 

Step 7- Sprinkle Baking Soda- Once the area gets dry, you can sprinkle enough baking soda on the stains and wait for it to settle. Once it gets settled you can now use a vacuum cleaner to remove the baking soda from the mattress. Baking soda helps remove stains as well as odour elimination from the mattress. 

Step 8- Repeat The Process- Sometimes urine stains can be hard to get rid of and you might need to clean them more than once. Repeat the process until you get the best bedwetting cleanup results. Repeat all the steps from the start to get desired results. 

Step 9- Dry The Mattress- Once the mattress is cleaned thoroughly, you can use a dry cloth to soak up the excess liquid from the mattress. Now you can dry the complete mattress using a blow dryer or a hair dryer. You can also place the mattress under the fan for at least 4-5 hours to get rid of the moisture from the mattress. Once the mattress is dried up you can place it back properly. 

How to Prevent Bedwetting on Your Mattress?

If your child has a habit of wetting the bed often, you can buy a waterproof mattress pad for your Bedding maintenance. Although it feels soft, a waterproof pad features a waterproof covering that prevents liquids from penetrating the mattress. Even if your child has an accident at night, you can easily wash the waterproof liner by removing it. Additionally, a waterproof liner keeps moisture from leaking, keeping it contained until the liner has to be washed. The majority of liners may be washed in a washing machine, however, to remove any excess liquid before doing so, we advise lightly hand washing the liner first.

Conclusion: In case you find it difficult to get rid of the wet mattress urine stains and smells on your own using the above-given ideas, you can hire professional cleaners for mattress steam cleaning. This technique can alone solve all your queries about how to clean up after bedwetting. So consider what is beneficial to you and your kids and keep your mattress in healthy condition.